
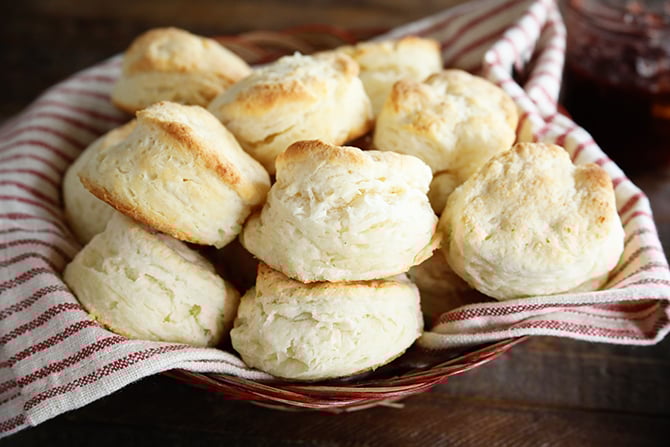
Buttermilk Biscuits are perfect for any breakfast. This easy recipe combines just 3 ingredients in a simple approach to this beloved Southern staple!
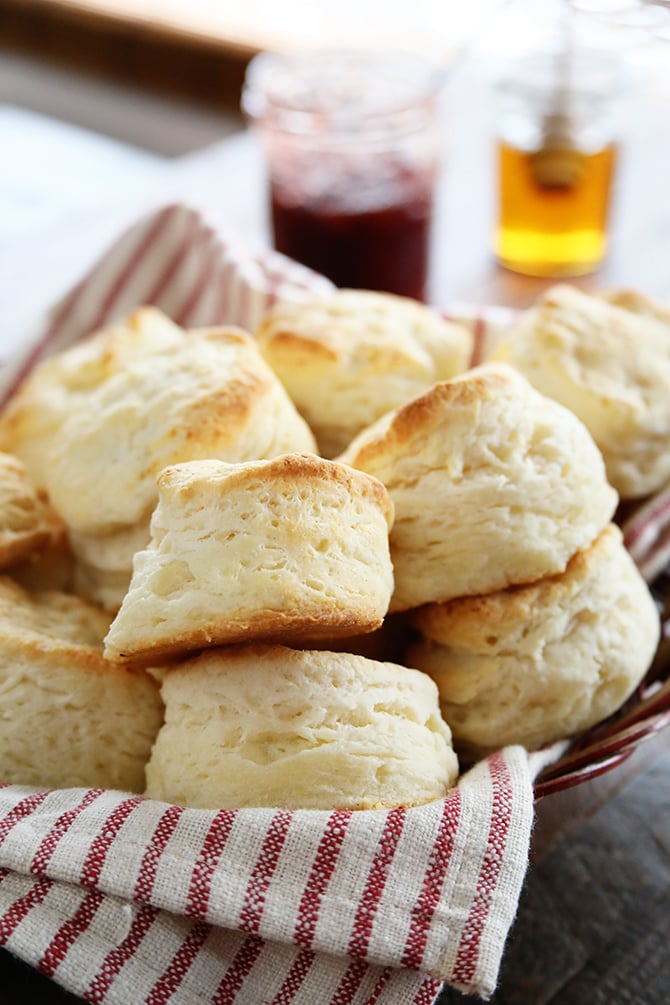
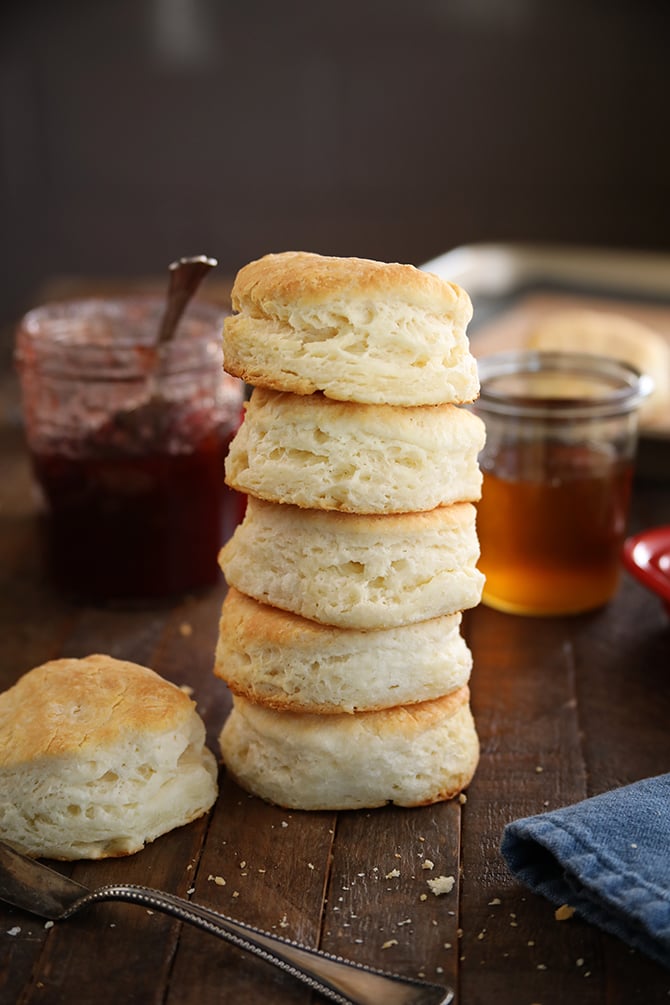
Making perfect, mile-high, tender, flaky biscuits is an art for sure. But, it doesn’t have to be super complicated. I’ve been making biscuits for something like 30 years, so I’ve picked up a few tips and tricks along the way to make the process, dare I say it… easy! Equipping yourself with these little nuggets of knowledge will turn you into a biscuit-making master for sure.
What are buttermilk biscuits?
Buttermilk biscuits are a popular breakfast staple in the South. These flaky, tender, and slightly tangy biscuits are usually enjoyed as a side dish or for breakfast.
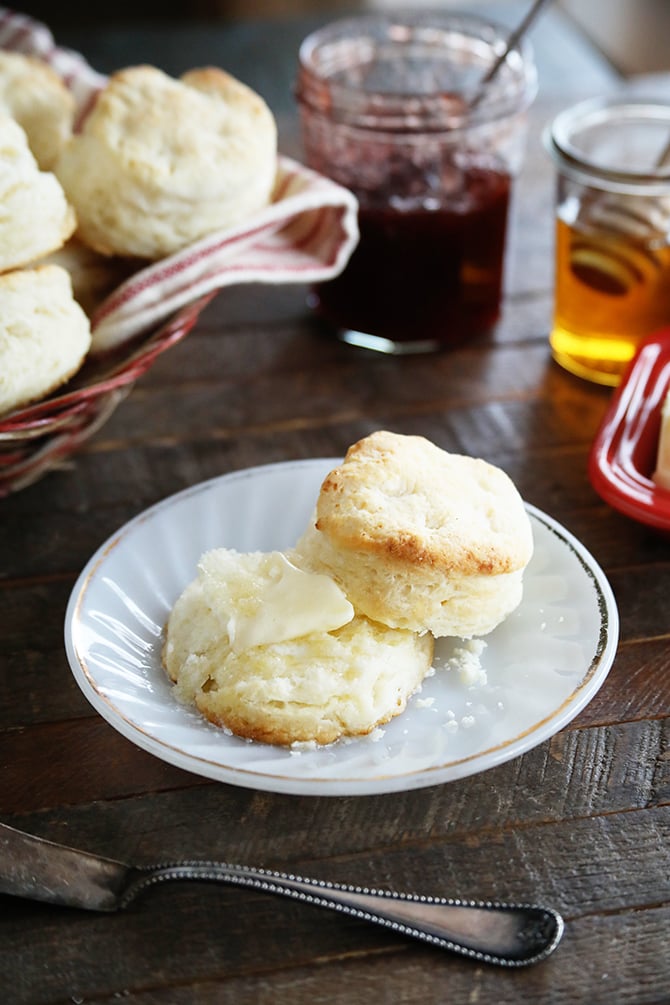
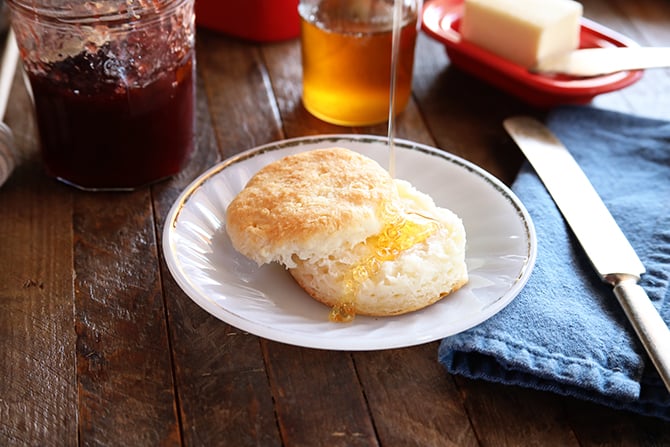
Buttermilk biscuits are super versatile. You can enjoy them with jams, jellies, butters, and honey. They make delicious breakfast sandwich and buried in gravy, especially my sausage gravy!
How to substitute milk for buttermilk:
Don’t have buttermilk on hand? Only have regular milk? No problem! While there may be a slight change in flavor, you absolutely can convert regular milk into a buttermilk substitute with the help of vinegar or lemon juice:
- You will need 1 tablespoon of vinegar or lemon juice for every 1 cup of milk.
- Start by adding 1 tablespoon of vinegar or lemon juice to a 1 cup liquid measuring cup. Then add enough milk to create 1 cup. Stir the milk and lemon juice or vinegar really well.
- Let the mixture sit at room temperature for about 5 to 10 minutes. The milk will curdle slightly and thicken. It will also develop a tangy flavor similar to buttermilk.
- Once your improvised buttermilk has thickened slightly, it is ready to use.
What type of flour to use when making buttermilk biscuits:
Let’s talk about flour. Southern cooks are quick to tell you there’s only one flour when it comes to making biscuits and that’s White Lily (and no, this is not sponsored). White Lily flour is milled from a soft winter wheat which gives it some distinct advantages in terms of biscuit making.
This wheat is low in protein. And, protein is what creates gluten when it’s introduced with liquid. Gluten is what gives things like baguette and pizza dough its deliciously chewy texture.
But, we don’t want chewy biscuits, so we want to do everything we can to reduce the gluten formation when making biscuits. Starting with a flour that is lower in protein means there’s less gluten development. It’s a little insurance policy against gluten, if you will. Less gluten means tender, flaky, high-rising biscuits. Just how we like ’em!
How to convert all-purpose flour into self-rising flour:
Now, I much prefer to go with White Lily Self-Rising Flour because it already has the baking powder and salt well mixed in and saves me a few steps. I like to buy it in smaller bags and then store it in the freezer for a longer shelf life. (I also keep self-rising flour around to make my delicious Pecan Chewies.)
If White Lily All-Purpose flour is all you have around, simply add 1 1/2 teaspoons of baking powder and 1/2 teaspoon of salt for every cup of flour that you’ll need.
How to measure flour:
How you measure your flour is super important. Here are a few helpful steps I take to ensure the flour is ready for perfect biscuit results:
- Sifting flour is great, but not necessary. Simply run a fork through it to lighten it up a bit.
- Then, use a spoon to spoon the flour into your dry measuring cup.
- Level off your flour along the rim of your measuring cup with the flat edge of a knife or a straight-edged surface.
*Special Tip: Do not pack or jam the measuring cup with flour. Also, avoid scooping the flour with the measuring cup. This can throw off your liquid to flour ratio.
How to turn out the dough?:
When it is time to turn out the dough. You only need three things: a floured surface, a flat surface (countertop or pastry mat), and this helpful video above that walks you through each step of turning out dough.
Here are the main steps written out for you too:
- Knead the dough a few times to get it all together.
- Flatten out the dough into a rectangle. You can use a rolling pin here, but I just use my hands.
- Fold the dough over on itself in a tri-fold fashion to help create those flaky layers.
- Flatten back out into a rectangle. You’ll want to do this tri-fold thing 3 or 4 times to get all those flaky layers in there.
- Finally, flatten the dough out to about 3/4 to 1-inch thick.
- Grab your sharp biscuit cutter, and you are all ready to cut those biscuits out!
Tips for cutting biscuits out of dough
- Use a sharp biscuit cutter to cut the biscuits out.
- Do not use dull-edged things, like a glass. This can seal the edges of the biscuits together and prevent them from rising.
- Use a quick up and down motion to cut the biscuits out. Don’t twist the cutter. This will also seal those edges together.
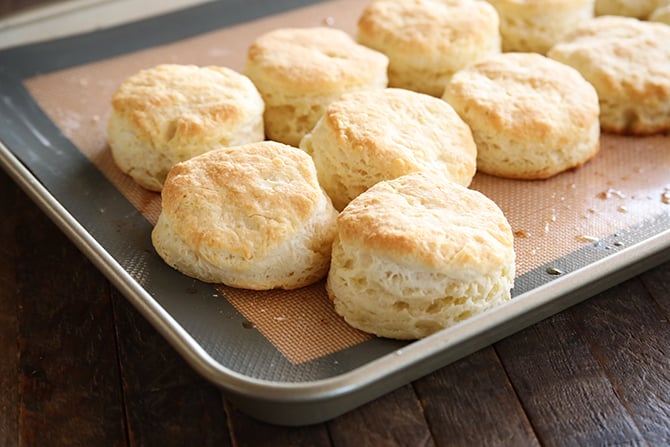
- Transfer the biscuits to a baking sheet lined with a silicone baking mat or some parchment paper.
- Place the biscuits based on your desired edge – crunchier and flatter vs. more tender and higher. If you want your edges to be more tender, place them on the pan nearly touching. If you want a crunchier edged biscuit, make sure there is a little more space between each biscuit.
- Between cutting out biscuits, smoosh all the dough together and knead it a few times before flattening it out again. There’s not really a need to do the tri-fold layering step again at this point.
- Don’t mind square biscuits, and want to save a step? Use a pizza cutter when you first flatten the dough out and cut the dough into roughly 3-inch squares. It will keep you from having to rework the dough and save you some time. Yeah, you’ll have square biscuits, but they’ll be just as delicious.
- Brush the biscuit tops with a little melted butter and bake! You can also brush melted butter on them when they come out of the oven too. The more butter the better!
Recipe Card
Easy Buttermilk Biscuits
Ingredients
- 2 cups White Lily Self-Rising Flour
- 1/2 cup cold unsalted butter
- 3/4 cup cultured nonfat buttermilk
- 2 tablespoons unsalted butter, melted
Instructions
- Preheat the oven to 450°F and line a baking pan with a silicone baking mat or a piece of parchment paper.
- In a large bowl, measure the flour by spooning it into a dry measuring cup and leveling it off.
- Next, cut the butter into the flour. Do this by using a pastry blender to cut the butter into pieces the size of a small pea. Or freeze the butter and grate it on a box grater then stir the flour and grated butter together.
- Add the buttermilk and stir until just combined. The dough should be like thick mashed potatoes, but not too sticky. Add a little more flour if too sticky, or a little more buttermilk if it won't hold together.
- Turn the dough out onto a floured surface and knead it a few times if it's not holding together too well. Flatten the dough out into a rectangle and fold it over on itself in a tri-fold fashion. This helps to create those flaky layers. Continue lightly dusting the dough and the counter with flour to keep things from sticking. Then flatten it out into a rectangle again and tri-fold once more. You'll want to do this about 3 times.
- Finally, flatten the dough out into a rectangle that's about 3/4 to 1-inch thick and use a floured, sharp 2 to 2 1/2-inch biscuit cutter to cut the dough out using a quick up and down motion – being sure not to twist the cutter. Transfer the biscuits to the prepared baking pan, placing them nearly touching for soft, tender edges or farther apart for crunchier edges.
- Rework the dough and flatten it out to cut more biscuits out. You should get between 10 and 12 biscuits. Brush the tops with the melted butter and bake for about 15 minutes, or until golden brown.
Notes
Nutrition
* If nutritional values are provided, they are an estimate and will vary depending on the brands used. The values do not include optional ingredients or when ingredients are added to taste. If calorie count and other nutritional values are important to you, I recommend grabbing your favorite brands and plugging those ingredients into an online nutritional calculator.


Myra Watts
Hey Stacey, how about using butter flavored crisco for butter in your buttermilk biscuits?
Thanks
Myra Watts
You can absolutely do that, Myra! Enjoy!
Michele Collins
I was wondering about the parchment paper. The box on mine says safe up to 420 F. Just wondering if that is an okay temperature for this recipe. Thank you, can’t wait to try with your chocolate gravy recipe.
Because of the relatively short cook time, it’ll be just fine.
Grampa Bill
I gotta tell you, Stacy I’ve been using your recipes for quite a while biscuits and gravy as well as others but this Christmas I wanted to try something new being a Northern boy I came across your pineapple cheese casserole. I thought I would make this for a Christmas dinner with my grandchildren and their husbands. I was a bit reluctant. A couple of them are kind of finicky eaters, but I did it anyway and let me tell you it was the extreme hit. It was the main feature. They loved it and I think I gotta keeper here. And you know this is going to be a feature side dish from now on thank you thank you for introducing me and my family to this wonderful side dish. Grampa Bill
Grampa Bill, I love hearing this! I’m so glad you took a chance on the Pineapple Cheese Casserole and that it ended up being the hit of Christmas dinner, even with a couple finicky eaters in the mix. That’s always the best kind of surprise. Thank you for trusting my recipes and for taking the time to come back and tell me, and I hope it earns a permanent spot at your family’s table for a long time to come.
Peter r Fjeld
Biscuits were tall and flaky. Delicious!!
But I only got five biscuits. Next time I’ll double the recipe. I’ll also switch to White Lily flour.
I’m so glad to hear your biscuits turned out tall and flaky! Doubling the recipe is a great idea, especially if you want some extras. White Lily flour can definitely give them a nice texture too. Enjoy your next batch!
Lisa Behrer
I’m giving a 5 star right now due to the ease of prepping these. But, they’re in the oven.
I am pretty sure I will love them. So my question is when I make more and freeze them on what temperature do I bake them and how long? Thank you
Hope they turned out great! It honestly just depends. You can bake on the same temp and add about 5 minutes or so. Often times, I’ll reduce the temp by about 25 degrees and bake for an additional 10 mins. It sort of depends on your oven.
Libby
Can these biscuits be cut out and put in the fridge to bake tomorrow?
They can be frozen and baked from frozen, but I don’t recommend refrigerating them.
Bev Liggett
My very favorite white lily biscuit recipe so far! Loved how you showed how to make buttermilk in a pinch if you don’t have any. I loved your technical term too how you smoosh the dough out after you’ve made the first cut of biscuits, LOL that was great! Thanks for a great recipe.
I’m so glad you loved the recipe! It’s great to hear the buttermilk tip was helpful. And yes, “smoosh” is definitely a technical term, LOL! Thanks for the kind words!
Vicki L.
I’ve read that some bakers chill the biscuit dough before baking. Do you have an opinion about whether that is necessary or helps make better biscuits?
Great question! Chilling the biscuit dough can definitely help improve the texture. It allows the butter to firm up, which can lead to flakier biscuits. Plus, it helps prevent spreading during baking. So, while it’s not absolutely necessary, it can make a noticeable difference. Thanks for bringing this up!
Lu Ann Conley
Five stars!!!! Tried lots of homemade biscuits in 54 yrs of marriage this is the best! Could not find White Lily flour where I shopped here in North Carolina will keep looking what I did use was good. Love all your receipes!!
Thanks so much for the five stars! I’m thrilled to hear you loved the biscuits.
lisa
Thank you for that explanation! Makes sense.
Lisa
Why does it specifically call for non fat buttermilk? I have some whole buttermilk left over from making corn bread (that recipe did not specify a certain type) and I’ll try it with that but curious if there is something I should know.
Using whole buttermilk can bring too much fat to the recipe making the biscuits heavy and greasy. You can use it, but I’d recommend cutting the butter by about 2 tablespoons.
Vicki W.
Thanks to your recipe and some White Lily flour that I ordered online, I just made the BEST biscuits I’ve ever had….we make some good biscuits with regular flour too, but White Lily isn’t available around here. Son and I had sausage gravy on ours (husband doesn’t like any kind of gravy!!!!) and we were in heaven! Love your recipe!
Oh my goodness, you just made my day! I’m so glad y’all loved the biscuits—White Lily really is a game-changer, isn’t it? Sounds like you and your son had the ultimate Southern breakfast, even if your husband skipped the gravy. (More for y’all, right?) Thanks for sharing your success—it means so much!
AJ
Glad to have had the pleasure of making these biscuits today. I went through a few other biscuit recipes in the past, but hands down this is the “taste like mama’s” I was looking for. Thank you,, my search is over !!!
Love hearing things like that! Glad you enjoyed these, AJ!
Mary Ann Webster
love your buttermilk biscuits they are amazing
Thanks so much, Mary Ann!
Gin
OMG! This recipe was so easy and the biscuits are AMAZING! I had to add baking soda and salt to my flour as I didn’t have self rising flour and they are so flaky and tasty. This will be my go to biscuit recipe. Thank you!
Thanks so much, Gin!!
Jiji
How much baking soda and salt did you add? Also, making sure it’s baking soda and not baking powder. Ty!
Janine in the OC
This is THE biscuit recipe to use. Turned out fantastic. Been trying different recipes for awhile and I can stop looking. So fluffy, and great flavor with the butter. We don’t eat a lot of biscuits here in SoCal but my family will be asking for these. Biscuit Revival!!!!
Love this!! Thanks so much, Janine!
Louise
Hi Stacey, I just want to offer a hint about an easier way to make your own buttermilk. Put the tablespoon of vinegar or lemon juice in the measuring cup FIRST, then fill with milk. Easy peasey! 😉
YES! Genius! I actually recommend this method in a Facebook live video last week.
Tina L Wilkerson
These biscuits are awesome! I’ve been making biscuits for 45 years and this is the easiest recipe to use. Also like the fact that it uses self-rising flour, no extra measuring. Love them!
Thanks, Tina!
Myrna
It appears we all love biscuits. My late mother in law made the best biscuits but yours are like dying and going to heaven. Pass the butter and some honey. Thank goodness I don’t live near your test kitchen.
They’re so easy to love! 🙂
Linda Britt
We LOVE these biscuits. I’ve made them twice. I was skeptical about the parchment paper as I usually use an iron skillet, but they were nice and crispy on the bottom. I’m gonna make a batch to freeze. I want to get better and better. Thanks Stacey for this down home recipe. Blessings!
Thanks so much, Linda! Glad you enjoyed them!
Michael Coffey
My origins are from a small little town named Cabot Arkansas. Stacy hooked me line and sinker at the end of his buttermilk biscuit YouTube video demonstration when he was in the bleachers with the school mascot and took a biscuit off the tray and dipped it into a bowl of chocolate gravy. I have vivid memories of my granny Faye Baugh making the chocolate gravy and buttermilk biscuits. If you haven’t tried this treat you are letting the best part of life pass you by.
Thank you, Stacy. I’ll be making your recipe soon and will report back at that time. God bless. MJC is now in Southern Oregon
Thanks so much, Michael! I sure hope you’ll enjoy my version!
gwen
Oh no, I followed the recipe carefully, and they didn’t rise at all. What happened???
gwen
opps my flour was not self-rising! Will just have to try again with the correct flour!
I’m at least glad you found out what the issue was!
Yesenia
These were amazing. I didn’t have White Lily, but the King Arthur worked well. The biscuits were light and flaky. Tall doesn’t even describe their height. These were the best we have made thus far. Thank you for an awesome recipe!
That’s so awesome to hear! Glad they turned out great for you!
Sue Mclaren
I live up north and can’t find the brand of flour you recommend. What would you suggest?
I think you can buy it online or you might try a substitute like this. I’ve not tried that, though. https://www.chefsteps.com/ingredients/white-lily-self-rising-flour#:~:text=In%20a%20pinch%2C%20you%20can,4%20tsp%20salt%20(source).
Joy West
Hello! I have all of the ingredients but my buttermilk is full fat. Should I cut back on the butter or use less buttermilk? Will my full fat milk make a big difference?
It will make a little bit of difference and can cause the biscuits to be dense. I would use about 1/4 cup butter, if using full-fat buttermilk. Enjoy!
JT
Made these last night and they were awesome. I’ve printed the recipe to make again.
One question for you is what would be the substitute for self rising flour. I used AP flour and 3 tsp of baking powder. Was this a good proportion of flour to baking powder. Thanks!
Glad to hear they turned out great for you! If White Lily All-Purpose flour is all you have around, simply add 1 1/2 teaspoons of baking powder and 1/2 teaspoon of salt for every cup of flour that you’ll need. So, for the two cups needed here, you’ll add 3 teaspoons of baking powder and 1 teaspoon of salt.
Cindy
I’ve lived in the South my whole life but never learned to make biscuits. I tried a couple of times but it didn’t work out & I never got any lessons from the family. Mary B’s frozen biscuits were my go to. Until now. I got some White Lily flour & tried your recipe & method, it couldn’t be easier. They came out fluffy & delicious. Thanks so much for sharing the recipe & the video, it helped so much.
Cindy this is amazing! I know your family loved them!
Chris
D E L I C I O U S !!!
Came out perfect !
Oh I’m so glad!
Saralyn Fonville McDade
Hi Stacey,
Your recipe is full proof and just plain awesome! I have made this recipe twice, so my family thanks you! LOL. Thank you to you and your wife for sharing your journey and this recipe with us at the AUM alumni get-together. Also, your website is so user-friendly! Saralyn 🙂
It was so great to have y’all! I’m so glad you’ve gotten good use of the recipe.
Yoly
Thank you for sharing your recipe. My son is a very picky eater and he really enjoys them. I have a question about the biscuits we freeze. Do we need to thaw the frozen biscuits before we bake them?
Thank you again for sharing!
No need to thaw! So glad he loves them!
Yoly
Thank you!
Delinda
Finally! I was able to make homemade biscuits that were delicious. Thanks so much for sharing the recipe. The video was a very big help, too. And everyone should use White Lily flour. I didn’t really think it would make much difference but it sure did!
Awesome! I love hearing that the post and tutorial were helpful! You’re going to be a biscuit expert in no time!
Elykn
Can you substitute almond milk in this recipe? If not, can you suggest another biscuit recipe that can use almond milk? For health reasons that is all we use and I hate to buy “real” milk just for this only to throw most of it out. Thx
You can use almond milk, but the taste and texture will be a little different. You’ll need less almond milk as it’s a bit thinner than buttermilk.
Lisa
Hi Stacey!
Well, you’ve done it again! We were already ‘in love’ with your ham and cheddar biscuits, and now these buttermilk biscuits are over the top. My husband just raves every time I make them. LOL Tried many different recipes, but yours is the best. Love your website! 🙂 Lisa
Wonderful! That’s quite the compliment!
Louise
Five stars for the excellent tutorial! I was born and raised in Kansas where biscuits aren’t worshipped like they are in the South so I’ve never learned the art of making a great biscuit. Thanks for the lesson! I’ll try it out when this Chicago weather cools down, lol.
Thanks so much, Louise! I sure hope they’ll turn out great for you!
Kathy
Love these for making egg and sausage breakfast sandwiches. Quick breakfast when made up and wrapped in the fridge. Also delicious with sausage gravy.
So glad to hear you enjoyed them!!
Angel Epps
I’m a native California girl and didn’t grow up on homemade biscuits but I know what a good biscuit tastes like. I watched the video multiple times just be sure I understood all instructions, tips and nuiances before I started. I’ve made them twice, the first one were good but I knew with more practice I could get better. The second ones, I knocked it out of the park! Boy did they come out fluffy and soft centered. The second try I added some salt because the first time they tasted like they needed a little kick of something (don’t get me wrong we ate them). I was lucky enough to get some Lily White flour via internet because many receipes I’ve looked at recommended this flour and I’ve never seen it stocked on any shelf at the local stores. The next thing I want to master is getting them all consistent size especially after you have to pull togehter the scraps to cut. Thank you for such a great tutorial.
I’m so glad you found all these tips helpful, Angel!
Julie
Have always been too intimidated to make biscuits from scratch but had some buttermilk I had to use so tried these today. Easy and amazingly delicious. Thank you Stacy for this recipe and my new found confidence. Will be making these to put into thanksgiving dressing!
Wonderful!! I’m so glad that these turned out great for you!
Peggy Price
Stacy,
I have to tell you that these are the best tasting biscuits I have ever eaten. Instead of using my hands, I use a long piece of wax paper. I put flour on the paper & use that to work with the dough. I have shared them with all my friends & they all wanted the recipe, which I was glad to give them. I heated some that I made three days ago in the toaster oven today & they were so yummy. They are not like my Mothers’, but taste much better. Thank you so much.
Wonderful! I’m so glad that you enjoyed them, Peggy! They’re my absolute favorite!
Leo Cupp
Iuse a very similar recipe but like my mom I have been using shortening, Ill try butter next time .oh and you are correct ( you knew it ) White lily is the only flour to use
Thanks, Leo! We sure love them with butter at our house!
Surya-Patricia Lane Hood
I was reading through your tips for making the biscuits and one tip I can add to this is, keep the butter cold. I
like to get my hands in there, too, but the results are better if you don’t. Use your hands on the dough as little as possible to keep the butter cold; it makes the biscuits a bit more flaky. This is especially true for making scones; otherwise, they will be tough and hard as rocks.
Also, remember to use spell check to catch typos and the like before you post; I found two in this recipe.
Thanks for taking me back to my childhood and my grandmother’s kitchen. I’m in my early 80’s and some of the southern recipes you post are ones I grew up with; they come popping out at from my memory reminding me it’s been a long time since I tasted that particular results from good southern cooking.
Hi Patricia! Thanks for chiming in. A few things: First, I actually never use a rolling pin and almost always use my hands. As long as you work quickly, the butter doesn’t get too soft. As a test, before sharing this recipe, I tested a batch using my hands and one using tools to keep from softening the butter, I saw virtually no difference. And since my hands are SO much easier, that’s how I do it.
When it comes to the typos, I greatly apologize. I did run spellcheck and had someone proofread. If you wouldn’t mind letting me know where those errors are, I’ll get them fixed.
Vanessa Mayer
I’ll reply on this one: Under your #6, biscuits is spelled “biscutis,” and under your Notes, “ho” should be “how.”
Thanks, Vanessa! Got those corrected!
Jan P.
Can you double or triple this recipe or is it best to make in single batches?
You can, though the large amount of dough can be difficult to work with, so I would portion it out and keep most of it chilled while you work with some of it.
Susan Erwin
I usually make drop biscuits and while they are good, I look forward to making these soon. Your instructions and tips are extremely helpful. Just out of curiosity, have you ever noticed on the side of the bags of White Lily All-purpose and Self rising flour, there is a notation that says: For every cup of flour in a recipe, substitute with 1 cup plus 2 tablespoons of White Lily flour? I noticed it a few years ago and have been doing so.
I have! White Lily flour functions a lot like cake flour since it’s so soft and light. This recipe was developed using White Lily so there’s no need for the conversion here.